Taking good care of your vape kit is imperative to maintaining its overall performance, making it easier for you to stick to it while saving your hard-earned money. We’ve compiled a full guide below so that you can keep your e-cigarette in prime condition.
Atomizer/Coil
Ensuring regular maintenance of your e-cigarette’s atomizer (also known as the coil) is the first step you’ll want to take in your care routine. Since the coil is responsible for turning e-liquid into vapour, it can be the reason for poor performance or a complete disconnection (i.e., no vapour).
Saturation
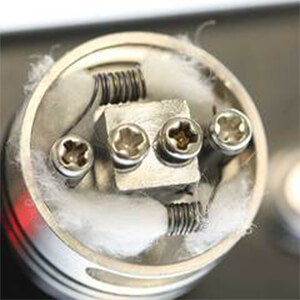
Atomizers are made of a wrapped wire coil surrounded by a wick, usually cotton. The wick absorbs the e-liquid, and the wire heats to vaporize that e-liquid.
In brand new coils, the wick will be completely dry. Before heating the coil (i.e., pressing the button), you’ll want to be sure that the wick is completely saturated, otherwise it will burn prematurely and risk ruining the coil.
We recommend letting coils soak in a tank full of e-liquid for 5 minutes or longer, especially if the coils are large. To improve the saturation speed, you can do what’s called “priming” by applying one to two drops of e-liquid directly to the center of the wick of each coil. Just be sure not to drip too much, as the e-liquid can travel down the center of the coil and lead to leaking from the airflow holes or spitting when the device is fired. Alternatively, you can prime your coil by closing your airflow ½ to ¾ of the way, and inhaling deeply through the mouthpiece without pressing the fire button. The force of the air will draw e-liquid into the wick faster, and have your coil ready to vape much sooner.
Atomizer Longevity
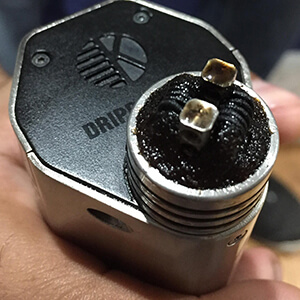
Coils will last an average of 1–4 weeks, depending on how, and how frequently, it is being used. When a coil is on its last legs, it should be replaced with fresh one, bringing your device’s performance level back to base level.
How to tell if your coil should be replaced:
- Vapour is beginning to taste burnt
- Vapour starts to feel harsher
- Flavour is not as pronounced
- E-liquid is leaking or spitting
- E-cigarette won’t fire or has a “no atomizer” warning
Tank
Caring for your tank ensures that your device will keep giving you optimal flavour and vapour.
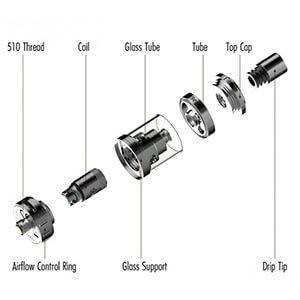
Cleaning
The great thing about tanks is that they can be completely disassembled, and each piece can be cleaned individually. The only part you don’t want to clean is the coil, as these are disposable.
It’s best to clean your tank when replacing your coil. Before installing a new one, you can rinse all of the parts of your tank under warm water to remove any stuck-on e-liquid residue that may be clogging it up from the inside. Avoid using soap when cleaning your tank, as it can dry onto the parts of your tank and mix into your e-liquid (yuck).
Once all of the parts are completely dry, you can reassemble and fill the tank. With a well-maintained tank, you’ll most likely notice a heightened flavour and reduced leaking/condensation.
Caring for Your Tank’s Glass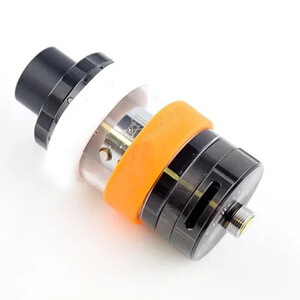
Tanks with exposed glass may be at risk for damage if they are accidentally dropped. That’s where vape bands come into play. Vape bands are small silicone rings that fit around the width of your tank to act as a barrier, protecting the tank’s glass in the case of a fall.
Mod
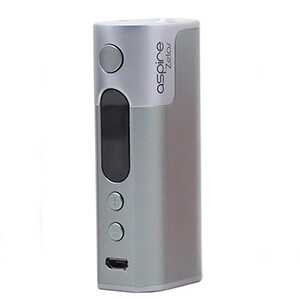
Mods, the part of the e-cigarette that contain the battery, are the power source of the device. Keeping your mod in good shape will make sure that your e-cigarette continues to perform at its best.
Silicone mod covers may be available for certain models, acting as an extra layer of protection for your mod.
Mods with Internal Batteries
Some mods are manufactured with the battery cells installed internally, and so they cannot be removed. With internal battery mods, you’ll want to charge the device via a micro USB passthrough cable for a maximum of three hours to avoid overcharging. While charging your device overnight can be convenient, it ultimately can cause damage to the battery cell, and over time, decrease the mod’s battery capacity throughout the day.
Mods with Removable Batteries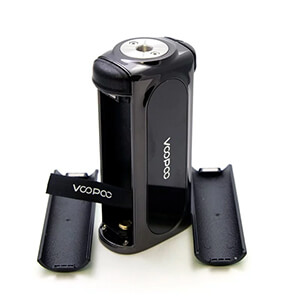
Similar to internal battery mods, mods that require removable battery cells can often be charged via micro USB passthrough cables. However, we recommend that you charge your battery cells using an external battery charger, which prevents overcharging by automatically stopping the connection once the batteries are full.
Safety with Battery Cells
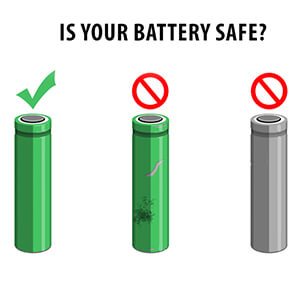
Lithium-ion batteries commonly used for vaping can be extremely hazardous if not properly handled. You’ll want to ensure that your batteries stay clean and free of any residue, including any leaked e-liquid.
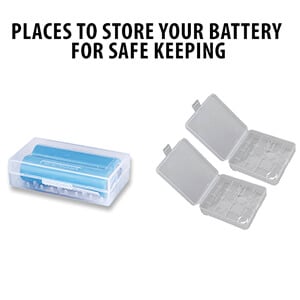
When transporting vape batteries outside of your device, never carry them loosely, as closing the circuit accidentally with harmless objects like keys, coins, or other metal, can cause the cells to discharge and risk harm to yourself and others. Keep your spare batteries in a silicone skin or plastic case to avoid any issues.
Other Maintenance
Here are some other tips for keeping your device performing optimally:
- Make sure that your e-cigarette is clean and dry, removing any e-liquid or condensation with a rag or tissue
- When not in use, leave your device upright to avoid the coil drying out or over-saturating
- Stay within the wattage range recommended on your tank’s coil to promote consistent performance
Related: How-to Guides for Vapers, How to Use Various Modes on Your Vape, Coil Building for Beginners


